Open Designs for
Giant Hoop-It-All(tm)
|
1 - Select the "Editor" mode. |
Picture No. 1

|
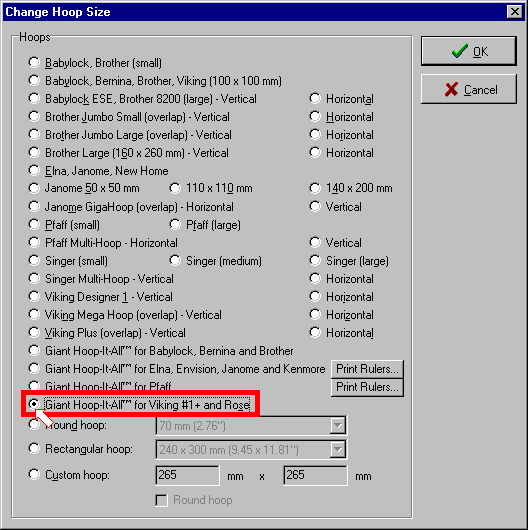
3 - Choose Giant Hoop-It-All(tm) for your sewing machine. (Picture No. 2). |
Picture No. 2

|
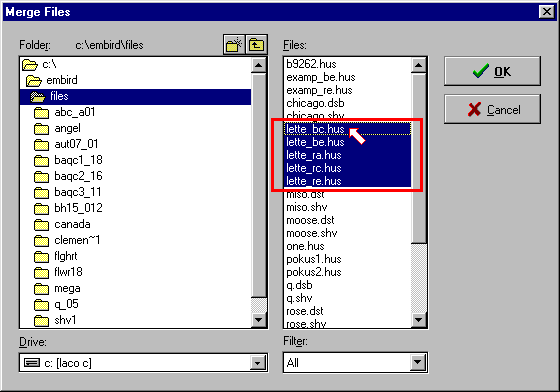
4 - Click on "File" menu and choose "Merge" command. Dialog box will appear. (Picture No. 3). Select the file or files you want to open. You can select multiple files at once (e.g. by depressing SHIFT key when you are clicking on filename). |
Picture No. 3

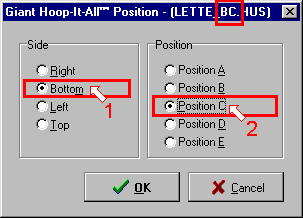
| 5 - Embird will ask you about hoop position for every file being merged (opened). Specify the "Side" and
"Position" in the dialog box that appears on the screen (Picture
No. 4). Positions A, B, C, D correspond to lines marked on the rails of your Giant
Hoop-It-All(tm)*. If you are opening files that were prepared in Embird,
you can deduce the side and position from the last two characters of the
file name, e.g. "lette_bc.hus" means "Side B", "Position C". *Note: For Pfaff and Janome machines, within Editor click on Options -> Hoop Size and you will find the "Print Rulers" command next to the name of your hoop. This will print four rulers on your printer that you may glue on the rails of your GHIA. This provides the correct positioning marks for your machine. The GHIA for Viking and Brother machines have four lines for A, B, C, D positions drawn on the rails and the bottom of the rail is used to define the E position. 6 - Repeat the steps 4 to 5 for every individual or group of file you want to open. |
Picture No. 4

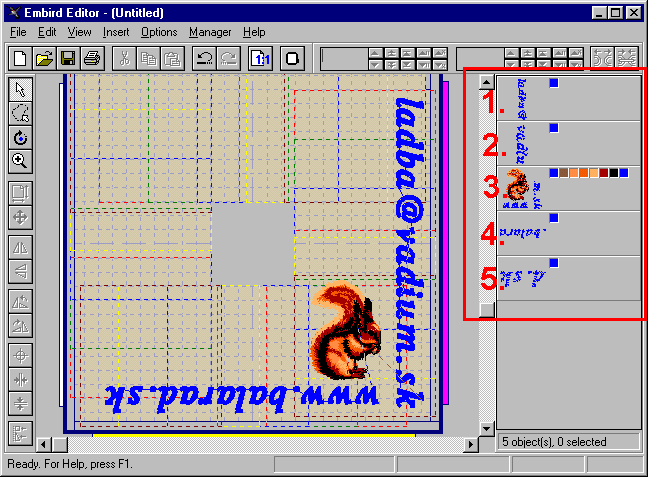
| 7 - Sometimes it may be necessary to change the order of objects. Drag and drop objects at Objects Order Bar, so that their order is correct. (Picture No. 5) |
Picture No. 5
